
-
About UsQingdao Qianchuan Woodworking Machinery Co. Ltd (Qianchuan for short) was founded in 1992,which is a modern professional enterprise and gathers designing, manufacturing and selling woodworking machineries.

-
-
NewsQingdao Qianchuan Woodworking Machinery Co. Ltd (Qianchuan for short) was founded in 1992,which is a modern professional enterprise and gathers designing, manufacturing and selling woodworking machineries.


News Center
A Comprehensive Beginner's Guide to Mastering the Piano Key Sanding Machine
Release time:
2026-08-01 11:30
A Comprehensive Beginner's Guide to Mastering the Piano Key Sanding Machine
In the world of woodworking, precision is key. Whether you're crafting a beautiful piece of furniture or fine-tuning a musical instrument, the right tools can make all the difference. One such tool is the piano key sanding machine, a device specifically designed to provide a smooth finish to wooden surfaces. If you’re new to woodworking or just starting to explore the versatility of electric tools, this guide will walk you through the essentials of using a piano key sanding machine effectively.
Table of Contents
- What is a Piano Key Sanding Machine?
- Benefits of Using a Piano Key Sanding Machine
- How to Choose the Right Piano Key Sanding Machine
- Safety Measures When Using Sanding Machines
- Step-by-Step Guide to Using a Piano Key Sanding Machine
- Maintenance and Care for Your Sanding Machine
- Common Mistakes to Avoid When Using a Sanding Machine
- Frequently Asked Questions
What is a Piano Key Sanding Machine?
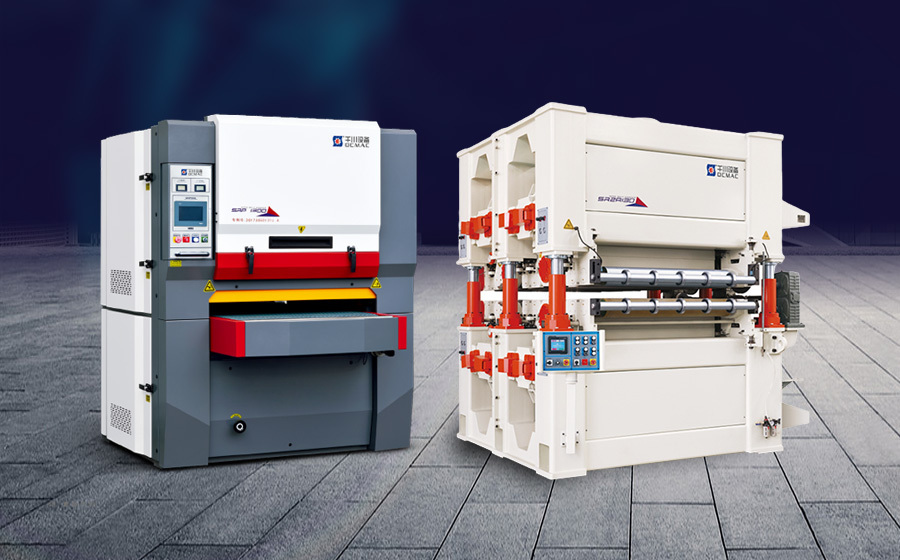
The **piano key sanding machine** is a specialized tool designed to sand the edges and surfaces of wooden piano keys or other small wooden pieces. It typically features a flat sanding surface and a powerful motor that efficiently removes material while providing a smooth finish. Unlike conventional sanders, this machine is tailored to handle smaller, intricate parts, making it ideal for both hobbyists and professionals in the woodworking industry.
Benefits of Using a Piano Key Sanding Machine
Using a piano key sanding machine offers several advantages:
1. Precision and Accuracy
The design of the piano key sanding machine allows for **high precision**, enabling users to sand uneven surfaces and edges accurately. This precision is essential for creating **perfectly smooth finishes** on delicate pieces.
2. Time Efficiency
With its powerful motor, this machine significantly reduces the time spent on sanding compared to manual methods. This time efficiency is crucial in a professional setting where deadlines are tight.
3. Versatility
While primarily designed for piano keys, this sanding machine can also be used on various wooden pieces, making it a valuable addition to any workshop.
4. Improved Finish Quality
Users can achieve a **superior finish quality** with a piano key sanding machine, which is often difficult to replicate with hand sanding techniques. The machine's consistent sanding action ensures uniformity across all surfaces.
How to Choose the Right Piano Key Sanding Machine
When selecting a piano key sanding machine, consider the following factors:
1. Motor Power
A machine with a more powerful motor will handle various materials more efficiently. Look for machines with a motor rating of at least 1 HP for optimal performance.
2. Sanding Surface Size
The size of the sanding surface is crucial, especially if you plan to work on larger projects. Ensure the machine has an adequate surface area to accommodate your needs.
3. Adjustable Speed Settings
Machines with adjustable speed settings allow for greater control when sanding different materials or surfaces, enhancing overall versatility.
4. Build Quality
Choose a machine made from durable materials to ensure longevity. A sturdy build can withstand regular use without compromising performance.
5. Brand Reputation
Research well-known brands in the industry. Reliable manufacturers often provide better warranty options, customer service, and product support.
Safety Measures When Using Sanding Machines
Safety should always be a priority when operating power tools. Adhere to the following safety measures when using a piano key sanding machine:
1. Wear Personal Protective Equipment (PPE)
Always wear safety goggles, dust masks, and hearing protection when operating sanding machines to protect yourself from debris and noise.
2. Keep Workspace Clean and Organized
A cluttered workspace can lead to accidents. Maintain a clean environment by removing any unnecessary tools or materials.
3. Use the Machine as Intended
Follow the manufacturer's instructions for operation and avoid using the machine for purposes it was not designed for, as this can lead to injuries or damage.
4. Secure the Workpiece
Ensure that the wooden piece is securely fastened before sanding to prevent it from moving unexpectedly.
5. Regular Maintenance
Perform regular inspections and maintenance on your machine to ensure optimal performance and safety. Clean the sanding surface and check for any signs of wear.
Step-by-Step Guide to Using a Piano Key Sanding Machine
Now that we've covered the basics, let’s dive into a detailed, step-by-step guide on using a piano key sanding machine:
Step 1: Prepare Your Workspace
Ensure that your workspace is well-lit, organized, and equipped with all necessary tools. Have your workpiece ready, and make sure your machine is clean and functioning properly.
Step 2: Set Up the Sanding Machine
Adjust the sanding surface and ensure that the machine is plugged in and powered on. Familiarize yourself with the control panel and speed settings before proceeding.
Step 3: Choose the Right Sanding Grit
Select the appropriate sanding grit for your project. Coarser grits (e.g., 80-120) are ideal for heavy material removal, while finer grits (e.g., 220-400) provide a smooth finish.
Step 4: Secure the Workpiece
Clamp the workpiece securely to prevent movement during sanding. If the piece is too small, consider using a jig or fixture to hold it in place.
Step 5: Start Sanding
Turn on the machine and select your desired speed. Begin sanding by gently guiding the workpiece against the sanding surface. Move it smoothly and consistently to avoid uneven sanding.
Step 6: Monitor Progress
Periodically check your progress and adjust the sanding speed or pressure as necessary. Take breaks as needed to avoid overheating the machine.
Step 7: Finish and Clean Up
Once you achieve the desired finish, turn off the machine and carefully remove the workpiece. Clean the sanding surface and workspace to maintain a safe and tidy environment.
Maintenance and Care for Your Sanding Machine
Proper maintenance is crucial for ensuring the longevity and performance of your piano key sanding machine. Follow these maintenance tips:
1. Regular Cleaning
After each use, clean the sanding surface to remove dust and debris. Use a soft cloth or brush to ensure all particles are removed.
2. Inspect the Sanding Belt
Check the sanding belt for signs of wear or damage. Replace it if it appears frayed or worn to ensure optimal sanding performance.
3. Lubricate Moving Parts
Apply lubricant to moving parts as specified by the manufacturer to ensure smooth operation and reduce wear.
4. Store Properly
Store the machine in a dry area, away from moisture and dust. Cover it with a protective cloth or tarp to keep it in good condition.
Common Mistakes to Avoid When Using a Sanding Machine
Even experienced woodworkers can fall into common traps when using sanding machines. Avoid these mistakes to enhance your sanding effectiveness:
1. Skipping Safety Gear
Neglecting to wear PPE can lead to serious injuries. Always prioritize your safety above all else.
2. Over-sanding
Over-sanding can damage your workpiece. Always take your time and check your progress frequently.
3. Using the Wrong Grit
Using a grit that is too coarse or too fine for the job can result in poor finishes. Choose the right grit based on the project requirements.
4. Ignoring Maintenance
Failing to maintain your machine can lead to decreased performance and shortened lifespan. Regular maintenance is key to prolonging the tool's usability.
Frequently Asked Questions
1. What materials can I use with a piano key sanding machine?
A piano key sanding machine is primarily designed for hardwoods but can also be used on softwoods and some composite materials.
2. How often should I replace the sanding belt?
The sanding belt should be replaced when it shows signs of wear, such as fraying or uneven sanding results. Regularly inspect it after each project.
3. Can I use this machine for large projects?
While the piano key sanding machine is excellent for small to medium projects, larger projects may require a more robust sanding machine.
4. What speed settings should I use for different materials?
Generally, softer woods can be sanded at higher speeds, while harder woods may require lower speeds to avoid overheating and damage.
5. Is it necessary to sand between coats of finish?
Yes, lightly sanding between coats of finish helps improve adhesion and achieve a smoother final appearance.
Conclusion
Mastering the use of a **piano key sanding machine** can significantly enhance your woodworking skills, enabling you to create high-quality finishes on your projects. By understanding the machine's function, implementing safety measures, and following proper techniques, you can achieve professional-grade results. Remember to maintain your machine diligently and avoid common mistakes to ensure longevity and optimal performance. Whether you're a novice or aiming to refine your craft, this guide serves as a comprehensive resource for your journey into the world of woodworking.
Related News
Comparing Electric Sanding Machines: Which is Best for Calcium Silicate Boards?
Comparing Electric Sanding Machines: Which is Best for Calcium Silicate Boards? When it comes to working with calcium silicate boards, choosing the right electric sanding machine can significantly impact the quality of your finish. These boards, known for their fire resistance, moisture resistance, and sound insulation, are commonly used in construction and renovation projects. They require proper
Improving Particle Board Surface Finishing with More Consistent Sanding
best particle board sanding machine factories provide efficient equipment for smooth, consistent, and high-quality panel finishing.
Floating Sanding Machine for Stable Thickness Control and Efficient Wood Panel Processing
The newest floating sanding machine china offers efficient, stable sanding for woodworking panels and surface finishing.

QingDao QianChuan Woodworking Machinery Co., Ltd.
Tel: 400-008-0088
mailbox: sales@qianchuanshebei.cn
Add: No.10, 3Rd Wanan Road, Shibei District, Qingdao, P.R.C
Copyright©2023 QingDao QianChuan Woodworking Machinery Co., Ltd. Seo